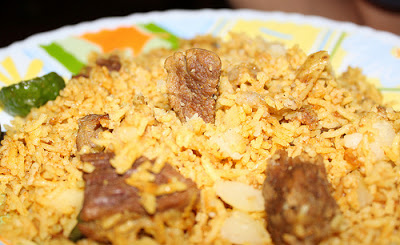
When Mom starts making her beef biryani, it is time to welcome sudden guests. They all somehow seem to know that she is making her most popular and most delicious dish of all, and just drop in for a visit! But seriously, this dish smells great right from the time she starts frying the onions, and you have to keep your drool in check, till the whole thing is done. I have been away from home (India) for over 13 years, and of all the home-cooked meals, this is the one I miss the most.
1. Pour the 5 cups of cooked rice into a large skillet and broil it on your stove, for about 3-4 mins. Put the broiled rice in a bowl of warm water and soak it for about 15 mins. It can soak longer if you take extra time doing the other prep work.
2. As the rice is soaking, you can prep the meat by putting it in a pressure cooker ( faster way to cook meats), along with HALF of the cloves, cinnamon, cardamom, turmeric, and salt to taste. Cook on high till you have about five whistles or whooshes of steam ( not a technical term, of course), then reduce the flame/heat to medium and cook for 10 mins. Turn it off and let it sit. Note: don’t open the pressure cooker lid until all the steam has escaped from the cooker first.
3. Put the ginger and garlic in a blender and make a paste. Set aside.
Cook:
1. You will need a big, flat-bottomed pot so that the heat can be evenly distributed. In India, we use big aluminum pots. It also needs to be big enough to hold 10 cups of cooked rice.
2. Heat oil in the pot and when the oil is nice and hot, put in the remainder of the spices, and then immediately add the onions and fry till golden.
3. Add the green chillies and tomatoes and fry for 3 mins.
4. Add the coriander and mint and fry for 3 mins.
5. Add the ginger-garlic paste and fry for 3 mins.
6. Add the chilli powder and the biryani masala and fry well for about 4 mins.
7. With a slotted spoon, take out the cooked meat from the pressure cooker and place in the pot.
8. Using a cup, measure the soup remaining in the pressure cooker and add it to the pot. Stir all ingredients and cook for about 5 mins.
9. Using a slotted spoon, scoop the rice out of the bowl and into the pot. Once the rice is in, check to see the level of water that is needed to cook the rice, and add water appropriately. Once the water is in, add the salt to taste.
10. Turn up the heat to high, bring to a boil. Once it boils, turn down the heat, cover and simmer for about 30 mins. Note: Don’t open it during the process and don’t stir the rice. Just let it sit and cook in the steam.
Mix the juice of one lime and a pinch of food coloring. At about 25 mins into the cooking, take off the lid and sprinkle the food coloring juice over the top, replace the lid and cook for another 5 mins.
I guarantee once this starts cooking, your neighbors might suddenly drop by…the aroma is unbelievable!!
This biryani can be served with Raita. I will add a recipe for Raita in another post.
Enjoy!!!


